
In our household summer is a time of grand ambition and limitless opportunity. Or so it seems, at the outset, with weeks of unbridled possibility ahead. Notes to self have accumulated steadily since last summer; we’ve got a long list of projects on our hands. THE LIST. In January we’re confident that summer’s long, warm days devoid of school (if not jobs) will be the magic elixir to rejuvenate our procrastination-prone existence with newfound motivation. The story we spin to ourselves goes something like this, “once summer hits we’ll clean out the closets and garage, get into shape, thoroughly weed the garden and repair the drip system. Then begin the bathroom remodel in earnest while working through the family budget. Fix the leaky kitchen faucet and degunk the shower drain. And grow some really fabulous tomatoes, too.” No problem, there’s still plenty of time.
 In childhood THE LIST, is merely loose mental notes of “fun stuff“, mostly spontaneous, oozing with the promise of entertainment and adventure. Lazy days of books, games, friends, pools and popsicles, without so much as a hint of responsibility or drudgery. In adulthood by contrast, THE LIST exists not because we have eleven free weeks to fill, but because who really wants to clean closets? Or degunk drains? We are confident in summer’s magic.
 Luckily tucked amongst this burdensome lineup is the occasional nugget of gold. On mine, I notice the scribbled words, “cook with kids” after “clean garage” and “drain”. This is something I strive for during the school year, but in everyday teenage life, there aren’t many opportunities. During summer though, I have an eager and available audience, and as a mother who loves to cook, this is what I live for. Bring on the open-ended prospects of a childhood summer day. We’re ready, with projects.
If you don’t have children, borrow one for a day—a niece, nephew, grandchild or neighbor. Or simply act the part. Pick an adventure and have fun jumpstarting the child within. In the end you’ll have something to set on the dinner table as well. Consider that a bonus. (By the way, the closets will wait.)
A few of our summer favorites:
Head berry picking then stir up a pot of molten homemade jam to can or freeze for months of sweet pleasure (stay-tuned for the how-tos in August)
 During a break in the hot weather crank the oven and roll out pizza
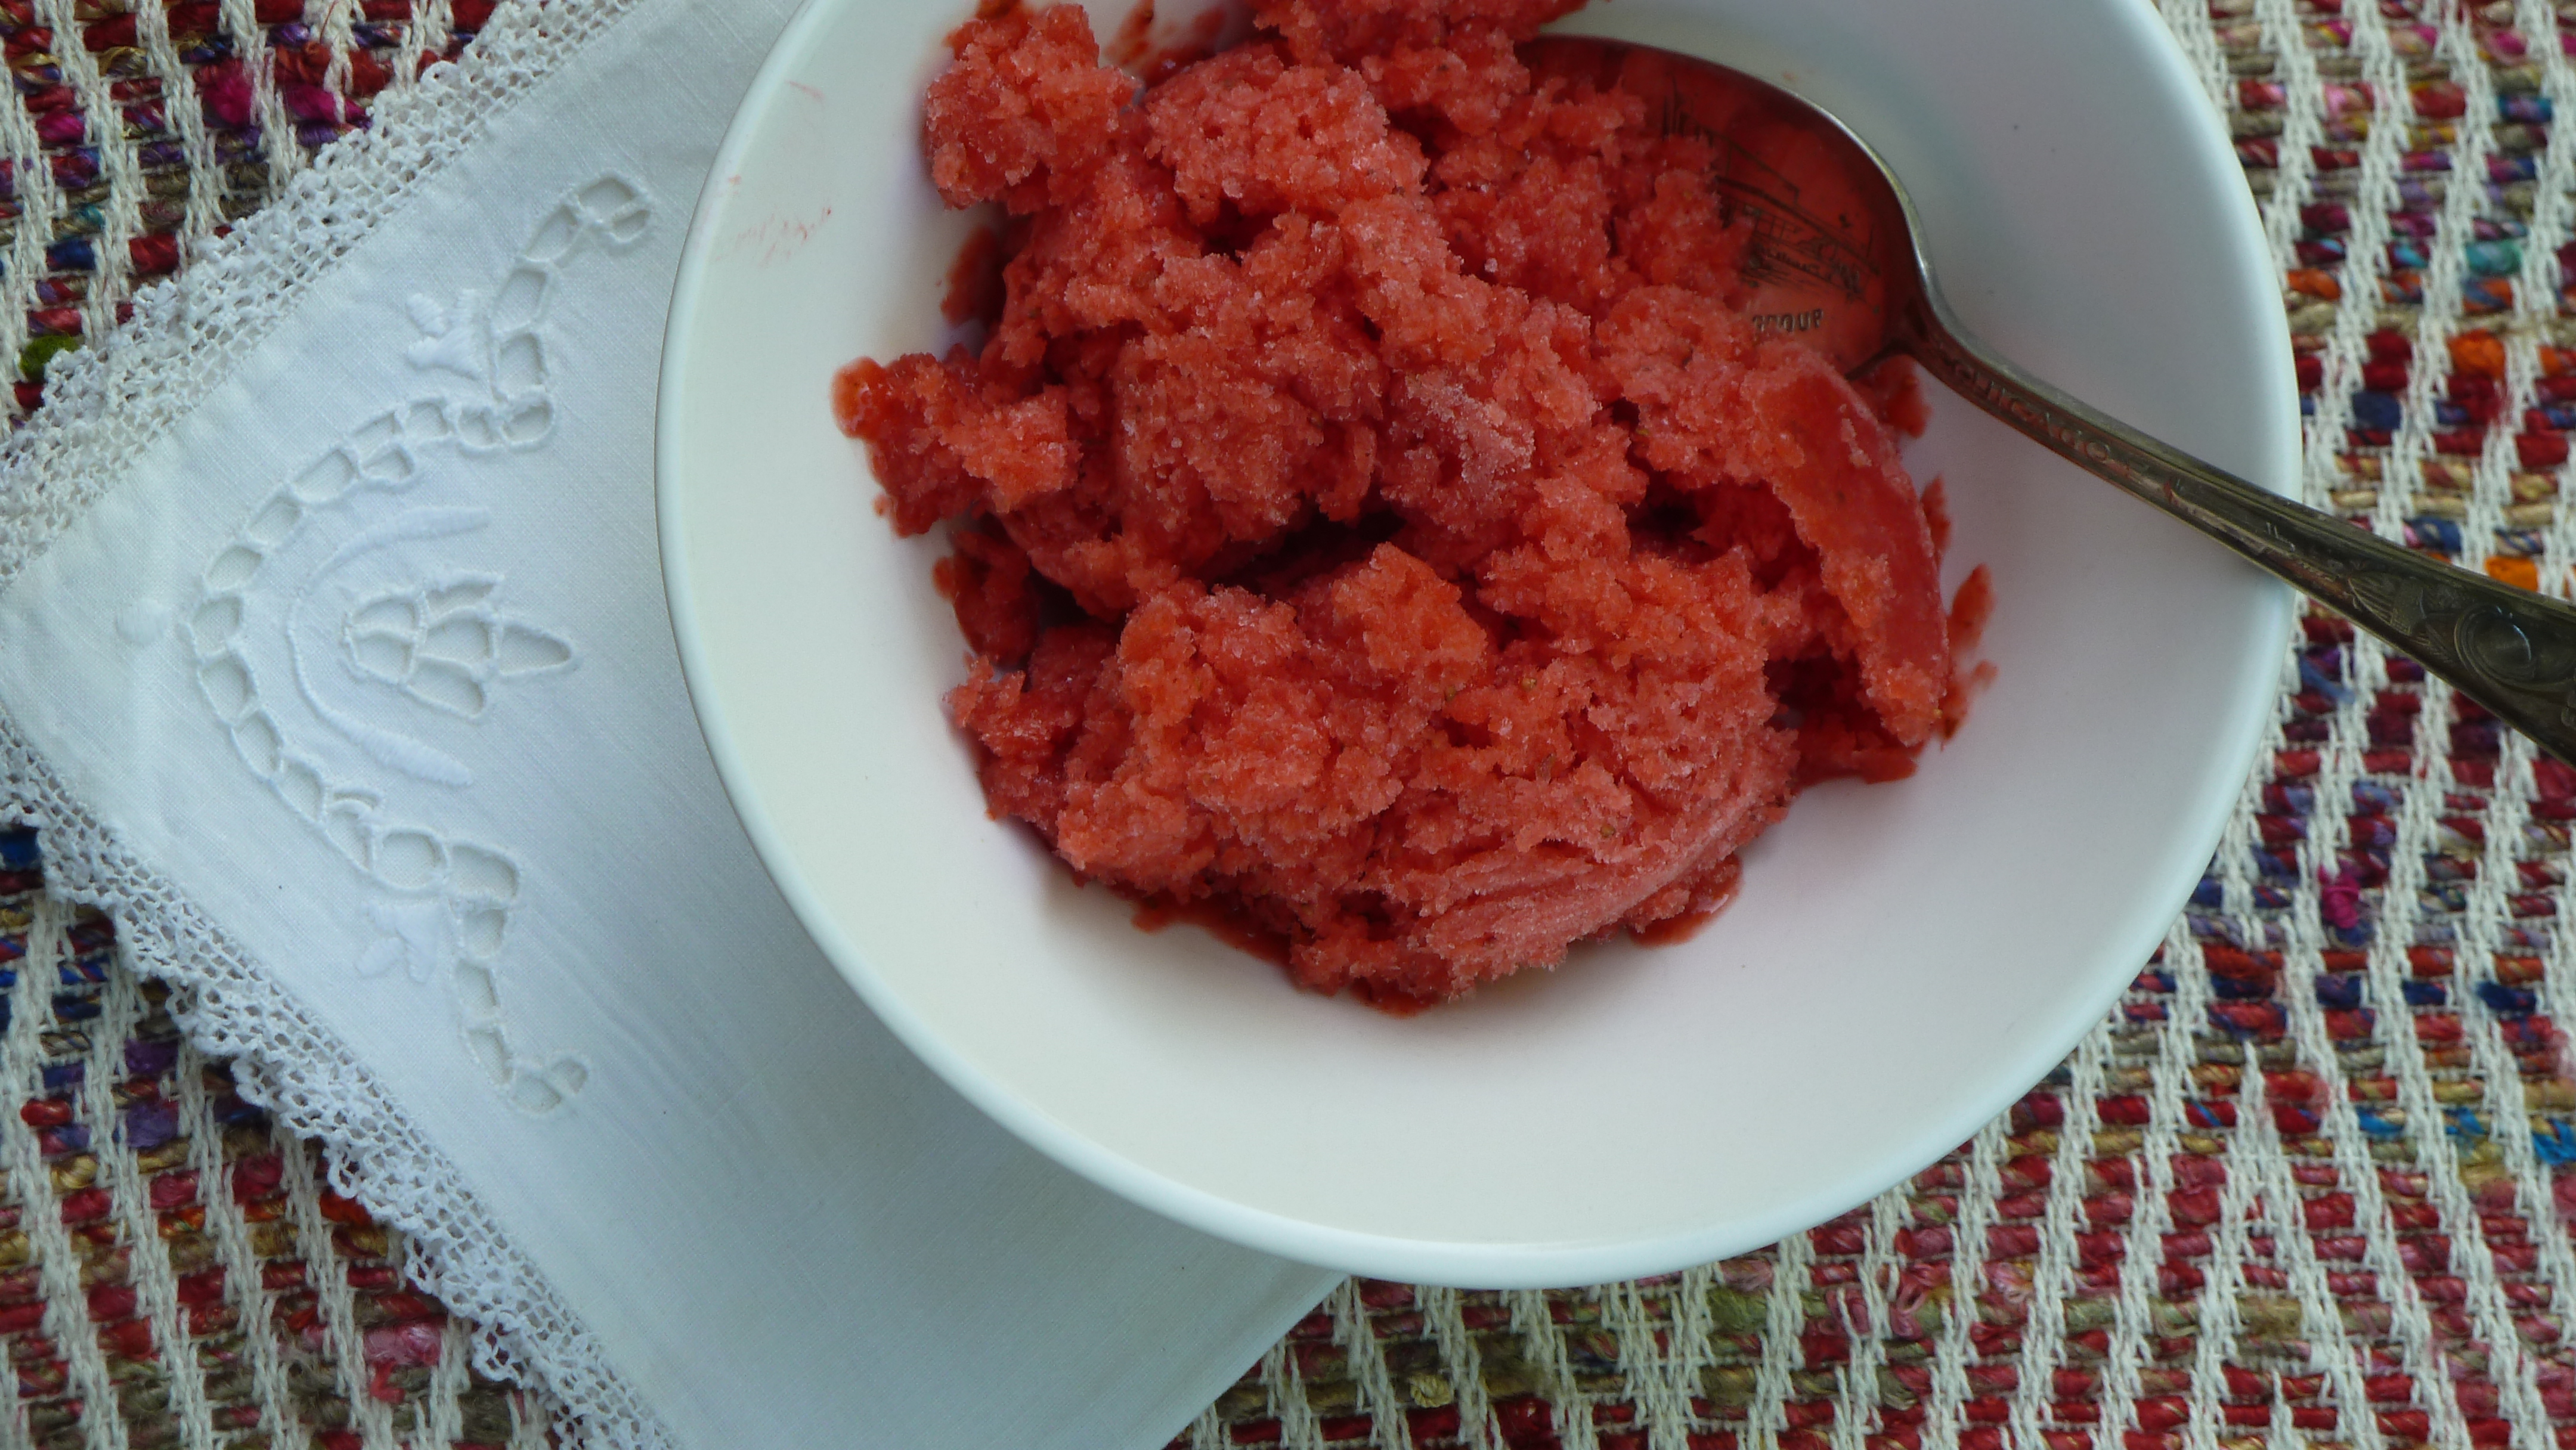
Ice cream, granita (the strawberry sort, pictured above, or citrus) and other frozen delights (try substituting pulp from other ripe summer fruit such as nectarines)
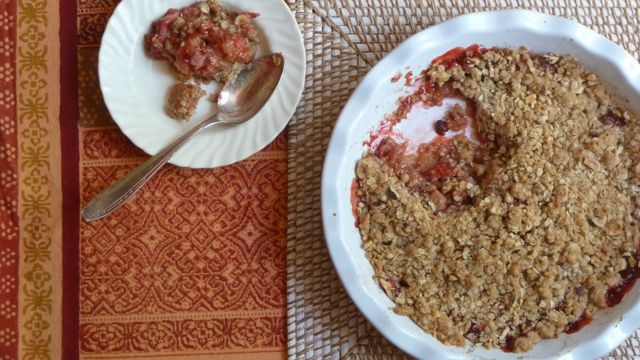 Biscuits (which can always morph into shortcake), brownies and baked goodies
Lemonade, for a stand, if there’s any leftover
And last but not least…
Pupusas con Curtido
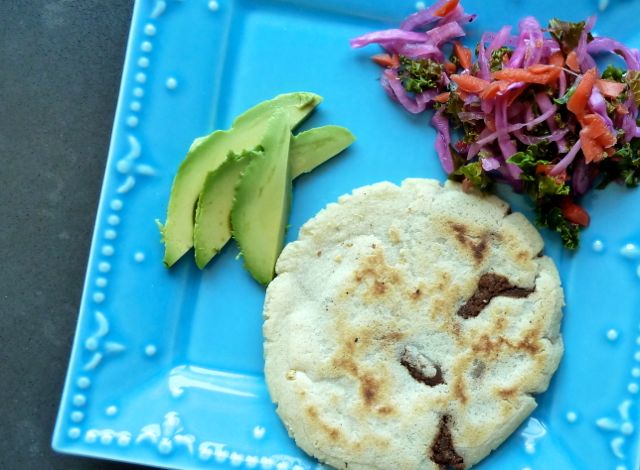
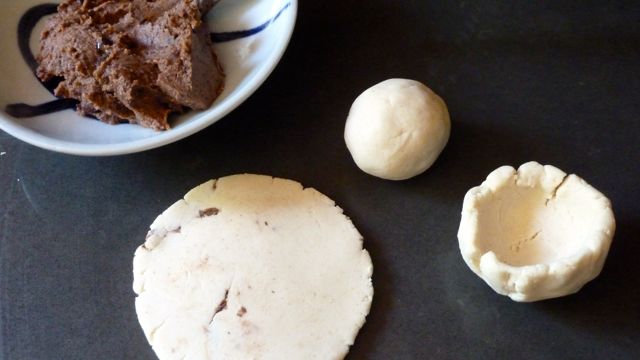
Pupusas (top photo) are plump, griddle-toasted tortillas made from finely ground cornmeal and stuffed with garlicky beans and melty cheese. Every country has its comfort food, and in El Salvador, this is a favorite. The bonus with pupusas is that they are easy to make while providing the tactile pleasure of an edible mound of play-doh (without the wild colors). All ages will relish the opportunity to play with their food.
 You will find masa harina at any grocery store with a Mexican section (Safeway for one). Pupusas are traditionally served with a pickled green cabbage salad known as curtido. In our California version (pictured left) we substitute crunchy kale and a handful of purple cabbage for color. With avocados this week, we can’t resist a garnish of avocado salsa as well.
Don’t be put off by the long list of ingredients and lengthy instructions. The details are meant for clarity, not to overwhelm. Once you get going you’ll find these savory cakes are easy to master. If you want to simplify, use canned refried beans instead of making your own. Or skip the salsa and simply top the griddle cakes with a bit of ripe avocado.
Serves 4
Ingredients:
For the curtido:
- 2 cups packed kale, stems removed, leaves cut into ribbons
- 1 large carrot, grated
- 1 small to medium red onion, thinly sliced
- 1 large handful shredded purple cabbage
- boiling water
- 1 teaspoon dried oregano
- 1/2 teaspoon salt (or more to taste)
- 1 teaspoon sugar
- 1/3 cup apple cider vinegar
- 1/3 cup room temperature water
For the beans:
- olive oil
- one small onion, diced
- two cloves garlic, minced
- 1/3 cup prepared tomato salsa
- one can black beans, drained
- salt
For the avocado salsa:
- one large or two small ripe avocados
- minced onion
- cubed tomato
- salt
- fresh lime juice
- chopped cilantro
For the pupusas:
- 2 cups masa harina, or similar finely-ground corn flour
- 2 cups warm water
- 1 teaspoon salt
- shredded cheddar or jack cheese
- sour cream, for serving
Method:
- To prepare the curtido, place the kale, carrot and onion in a medium bowl. Put cabbage in a separate one. Pour boiling water over ingredients in each bowl (enough to thoroughly douse) and allow to sit for one minute or so. Drain the water from each bowl and combine the ingredients together in a single bowl. Add oregano, salt, sugar, vinegar and room temperature water and stir to combine. Cover and refrigerate for at least one hour (and up to 3) to allow flavors to fully develop. Stir the ingredients every now and then so the dressing permeates all the vegetables.
- For the beans, warm one or two tablespoons oil in a skillet over medium heat. Add onion and cook until very soft. Add garlic, salsa and a pinch of salt, and cook until the mixture is fragrant and has cooked down a bit. Add the beans plus 1/3 cup water. Bring to a simmer, then reduce heat and cook gently until beans are very soft and nearly all of the liquid has cooked off without drying out the beans. Transfer to a food processor and pulse to a paste with a few chunks, or use a handheld immersion blender to blend beans in the pan. Cool. Taste and add more salt as needed. Skip this entire step if you are using canned refried beans. Note: After you assemble the pupusas you will likely have beans remaining. They make delicious leftovers, tucked into a warm tortilla later in the week.
- For the avocado salsa, combine cubed avocado with onion and tomato in whatever proportions you prefer. Gently fold in a pinch of salt and a generous squeeze of lime juice along with cilantro to taste.
- For the pupusa dough, mix the masa flour with the warm water and salt. Stir to combine then cover and set aside for 15 minutes.
- When you’re ready to make the pupusas, warm a nonstick or cast iron griddle over medium heat. Prepare a work surface with the dough (covered in a bowl), beans and cheese within easy reach. Have a large platter ready to receive the assembled pupusas that are ready to cook.
- To form a pupusa, take approximately 1/4 cup dough in hand (no need to measure precisely). Play with it as you like for a minute or two (this is where the fun begins). The dough should feel soft and pliable but not sticky (add a tiny bit more flour if the dough is overly wet). When you are done playing, form the dough into a ball. Using your thumb, press into the center of the ball to create a hole. Then work the hole with your thumb to shape the dough into a pot-shaped vessel, like a pinch pot (see photo above), if you’ve tried a hand at ceramics. (Don’t worry about imperfections—the pupusa will taste great however it looks.) Keep working the dough to make the walls of the vessel thinner, until you have a sizable depression in the center and the walls are about 1/4 inch thick (give or take). Now add a dollop of beans into the hole, plus a bit of cheese. Don’t overfill because you need to close up the hole. Do this by pinching together the top edges of the pot. The filling will be nestled inside. Hold the dough in hand and roll it back into a ball. Hold the ball between the two flat palms of your hands and press your palms together, very gently to flatten the dough into a circle. Some of the beans and cheese may peek out here and there. No worries, patch things up if you like with a bit of extra dough or ignore the imperfections. Keep flattening until you have a circle about 1/4 inch thick (the diameter doesn’t matter). You can also flatten the pupusa against a wooden cutting board (oiling helps to prevent sticking), then use a metal spatula to carefully pry it off.
- Place the finished pupusas on the hot griddle, side by side. The ones that don’t fit can be staged nearby on the platter. Cook each cake for about 3 or so minutes until marked with dark brown or black spots. Turn and cook on the other side. Repeat with remaining pupusas. You can shape and cook them concurrently, since the cooking doesn’t require much attention.
- Serve with prepared curtido, sour cream and avocado salsa. Or whatever combination you like.
