Recently I wrote about making the most out of every part of our fresh produce: what’s lately being called stem-to-root cooking. If we’re not mindful in the kitchen it’s all too easy to generate a mountainous pile of peels, stems, and roots without the slightest effort. Even in our most thrifty moments there’s still some waste, and throwing it in the trash can seem downright shameful in our reduce, reuse and recycle mindset.
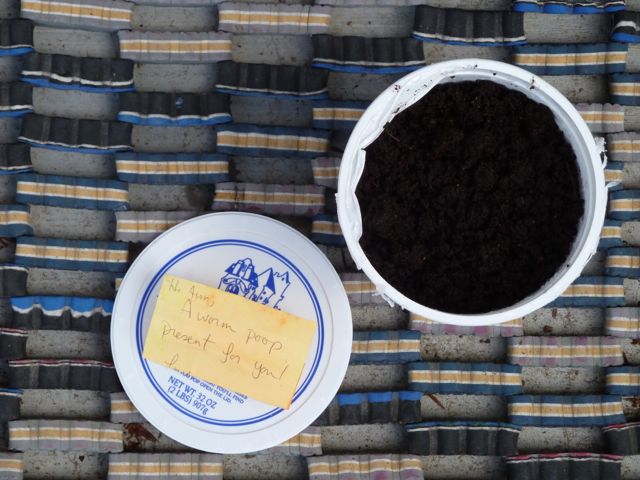
Finding a purpose for kitchen scraps brings to mind a generous present left on our doorstep a while back. Not the mysterious zucchini you might recall from an August newsletter but equally treasured. This time a container of worm generated, nutrient rich, plant fortifying compost left by a dear friend. A windfall for the garden – there are few simple gifts more thrilling to receive on a sunny spring day – your birthday still months away.
Gardeners will tell you that besides the spoils of the backyard vegetable patch, another treasure that warms our quirky hearts is “homegrown” compost. I’m talking about the intersection of decaying organic matter, microbes, worms and all manner of creepy-crawlies. Normally the stuff of nightmares and garbage dumps, to gardeners a personal pile of peels, leaves, stems and such, worked over by a squirm of red wigglers (aka group of worms) is somehow totally different, quite wonderful actually. We treasure this grungy heap just as we do eggs laid by backyard hens, home canned tomatoes and homemade cheese. As I’ve said before, one person’s garbage is another’s gold, and there is no finer gold for the garden than hand tended compost.
Composting might seem complicated, mysterious and yucky – all of which add up to avoidance, though we know we should give it a try. Truthfully, despite the mystique, this is not rocket science (though compost scientists do exist) and boils down to an everyday process at work around us, in haphazard backyard jumbles of fallen leaves, broken sticks and defunct matter, with nary an information manual or purchased bin in sight. Natural decomposition provides the fertilizer of the forest, fueling new growth better than anything out of a box. Why not harness the magic for our cultivated gardens and recycle that pile of peels in the kitchen at the same time?
Getting started requires nothing more than space in the yard. Choose a location close to the garden and a water source. Organic material naturally breaks down when exposed to air and moisture, but a mix of brown (carbon producing) and green (for nitrogen) material is necessary to create an active heap where microbes thrive and decay accelerates. The greens are soft and fresh like grass, raw vegan kitchen scraps and green leaves. The browns are crisp and dry: fall leaves, small sticks, wood chips or straw. Start with a mound of brown and green material, a little heavier on the former, water lightly to moisten, and allow it to sit. Continue adding material, building to the critical mass necessary for optimal decomposition. A pile roughly 3’ by 3’ by 3’ does the trick. Turn periodically to aerate, and moisten as needed. You’ll need to stop adding eventually, to allow the compost to finish (should take about 3-6 months). The resulting humus will be dark brown and crumbly, with a sweet, earthy smell.
If you get hooked, there are all kinds of prefab bins available to tidy up the process. I highly recommend an enclosed container, which allows for air circulation, while keeping marauding rodents out. We use a tumbler model that makes aerating easy work – simply rotate the barrel on its axle. Consummate gadget guy, my husband recently purchased a compact electric unit that somehow manages to churn out compost from kitchen scraps in a matter of weeks. Any apartment dweller short on space could find an empty corner to tuck this cute little toy away. For the adventuresome, worm bins, despite the horror film element, are actually fairly easy and considered the factory of choice for turning the mountain of peels into the finest compost around – think 24 karat.
There are loads of excellent on-line sources for supplies and information on the browns and greens of composting, including how-tos on YouTube. Here are a few basic tips…
Creating an Active Compost Pile:
If we passively allow a compost pile to sit without intervention, decay will naturally occur, albeit slowly. Creating the ideal environment accelerates the process.
- For faster composting select a spot in direct sunlight.
- An active pile will naturally heat up as microbes do their work – to a temperature between 120 and 160 degrees.
- Make sure to add a mixture of browns and greens, a bit heavier on the browns.
- Cut large pieces into smaller ones to jumpstart the process.
- If the pile smells it may need turning, less moisture or more brown (carbon producing) matter.
- Don’t overwater the pile – aim for moisture content similar to a wrung out sponge.
- If the pile has cooled off and not much seems to be happening, check the moisture level (possibly you need more) and turn the pile to aerate and rearrange decaying matter.


